

Q4 Shortcuts: Split Screen
Introduction
Splitting your screen is a super useful skill! It lets you keep two windows open side-by-side—perfect for looking back at a passage while answering questions, writing a response, or comparing information from different sources. It’s like having double the brainpower on one screen!
Step 1. If someone in your class already knows how to split the screen, ask them to demonstrate how they do it and try it out.
Example: Going to Google.com for Chromebook help displayed this message
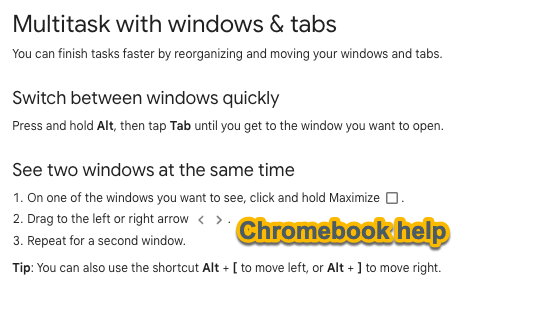
Step 2. Search for a shortcut to split your screen for your device by searching “How do you split the screen on a ____________?” (Chromebook, iPad, Mac, Windows PC, etc.)
Step 3. PRACTICE IT, SHARE IT, and TEACH IT to two or more individuals (a relative, classmate, friend, etc.).
- Practice it: Move this webpage to the right side of your screen and then open your Google Drive or OneDrive on the left side of your screen.
- This would be helpful when completing documents in this course while watching a video and taking notes.
- Share it: Turn to a partner and make sure you are both able to complete the Practice it.
- Teach it: Discuss splitting your screen with others - after class, at home - if they do not know how to split their device screen, offer to teach them.


Competencies & Standards
MITECS Michigan Integrated Technology Competencies for Students
1. Empowered Learner
d. Understand the fundamental concepts of technology operations, demonstrate the ability to choose, use and troubleshoot current technologies, are able to transfer their knowledge to explore emerging technologies
Websites and Documents
Websites